Home ► RIDE ► FAQs ► Answer
RIDE soon to migrate to another web domain, announced in the new version of the application, while this web domain silently ceases to function! Please update your bookmarks/links once the new version of RIDE is out!
How do I format a real floppy using this application?
Applies to: RIDE 1.7.6 and later
- Be sure to have the necessary driver for one of supported controllers installed.
- Click on Disk → New to show the New image dialog.
- Select the Disk Operating System (DOS, Alt+D) of your choice to show containers that are compatible with the selection. One of the containers (Alt+C) is Compatible physical device (shown usually as the last item in the list) – select it.
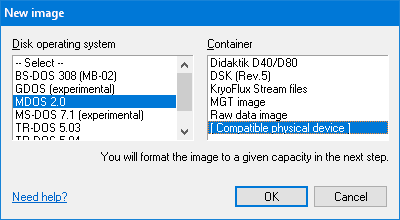
- Press the OK button. The application tries to find any of supported devices connected locally to the computer (which may take a while), and lists them in the Real devices dialog, with the most recently used device pre-selected.
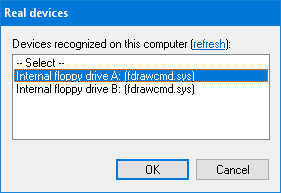
- Press the OK button. A new Format cylinders dialog pops up.
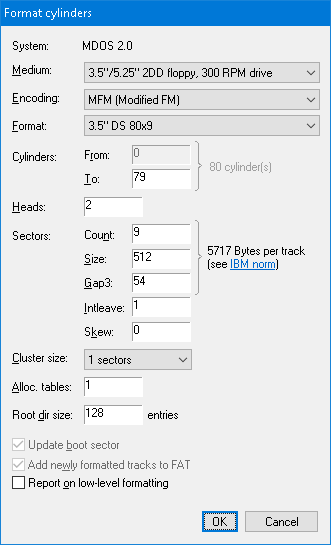
- In the Medium combo-box (Alt+M) confirm the type of floppy that is inserted in the drive selected in the Real devices dialog.
- In the Encoding combo-box (Alt+E) confirm the data encoding that will be used throughout the formatting. The latest encoding supported by selected DOS is always pre-selected, and you typically don't have to change it.
- In the Format combo-box (Alt+F) optionally select one of the predefined track layouts, or adjust the layout manually by modifying the format-related information fields (remainder of the dialog).
- Tick the Report on low-level formatting checkbox (Alt+O) to be informed on bad sectors (optional but recommended). As the Add newly formatted tracks to FAT checkbox (Alt+W) is ticked by default, all newly formatted sectors will be added to the file allocation structure – their verification depends on the floppy drive access options, explained in a moment.
Click on the OK button. A warning on erasing the whole disk is shown. Click on Yes.
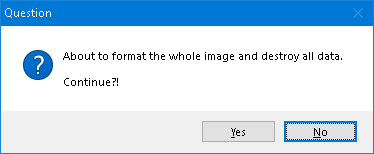
- This step depends on the device you selected in the Real devices dialog:
- Internal PC floppy drive (click to unfold)
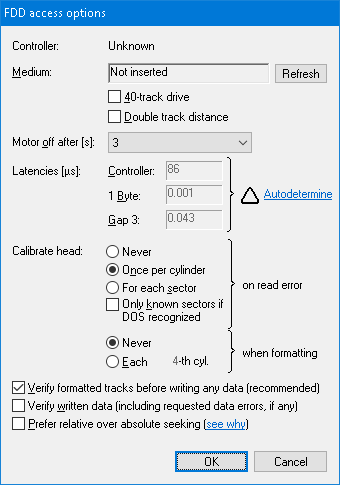
- A FDD access options dialog pops up. Values in the dialog have been optimally preset by the application to format a floppy. There are, however, several formatting-related settings that you still might want to revise:
- The following two checkboxes are for working with 40-track floppies: 40-track drive (Alt+4) when ticked specifies that the drive's nominal cylinder count is 40 (and going beyond this limit may destroy the drive), and Double track distance (Alt+D) when ticked specifies if an 80-track drive should be used as a 40-track drive. A warning sign ▲ may wrap both of these checkboxes to indicate potential inconsistency.
- Head calibration which you may turn on for each N-th cylinder to format (Alt+E), or turn it off and prevent head calibration during formatting.
- It is recommended to have the Formatted track verification (Alt+V) checkbox turned on. If turned on, bad sectors will be marked in the FAT initially as bad, otherwise they will be added as empty without verification.
You may leave the remaining values to their defaults and click on OK.
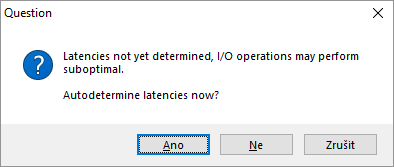
- If not done so before, the application suggests to autodetermine the floppy controller latencies. It is recommended to accept the suggestion by clicking on Yes – with correctly set latencies, the application can perform up to twice as fast than with the default values! Clicking on No, you reject the autodetermination this time, and clicking on Cancel makes the application ask no more about the latencies.
- Greaseweazle or KryoFlux (click to unfold)
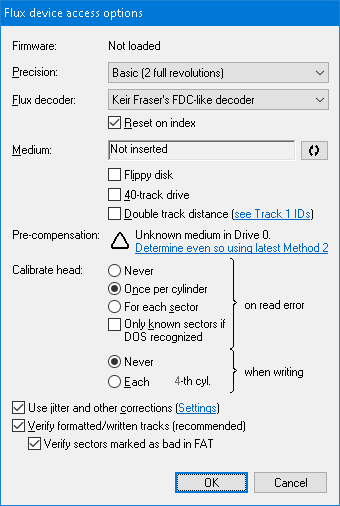
- A Flux device access options dialog pops up. Values in the dialog have been optimally preset by the application to format a floppy. There are, however, several formatting-related settings that you still might want to revise:
- The following two checkboxes are for working with 40-track floppies: 40-track drive (Alt+4) when ticked specifies that the drive's nominal cylinder count is 40 (and going beyond this limit may destroy the drive), and Double track distance (Alt+D) when ticked specifies if an 80-track drive should be used as a 40-track drive. A warning sign ▲ may wrap both of these checkboxes to indicate potential inconsistency.
- Flippy disk (Alt+I) indicates that inserted is a two-sided floppy originally used in a single-sided drive (in which it had to be flipped to read the second side).
- You should pay a special attention at the pre-compensation which should be determined by the latest method before attempting to format/modify a floppy (see why). If not determined or outdated for specific floppy type and/or drive, a warning sign ▲ appears next to the link to determine/update it.
- You may want to turn Head calibration on for each N-th cylinder to format (Alt+E), or turn it off and prevent head calibration during formatting.
- It is recommended to have Formatted track verification (Alt+V) turned on. If turned on, bad sectors will be marked in the FAT initially as bad, otherwise they will be added as empty without verification.
- To skip verification of bad sectors in magnetically unreliable parts of the disk (where verification in the end always fails), untick the Verify bad sectors (Alt+B) checkbox. Leave this checkbox ticked if working with original disks where bad sectors appear on healthy magnetic surface as part of a copy-protection scheme.
You may leave the remaining values to their defaults and click on OK.
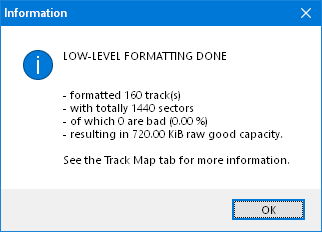
- If no problems are encountered, the drive starts working with the floppy. When done, you eventually will be informed on bad sectors (see figure below) and the formatted floppy will be opened by the DOS you selected earlier.
