Home ► RIDE ► FAQs ► Answer
RIDE soon to migrate to another web domain, announced in the new version of the application, while this web domain silently ceases to function! Please update your bookmarks/links once the new version of RIDE is out!
How do I open a real floppy using this application?
Applies to: RIDE 1.7.7 and later
- Be sure to have the necessary driver for one of supported controllers installed.
- Click on Disk → Open device command. The application tries to find all supported devices connected locally to the computer (which may take a while), and lists them in the Real devices dialog, with the most recently used device pre-selected. Confirm the selection by the OK button.
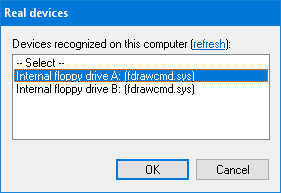
- This step depends on the device you selected in the Real devices dialog:
- Internal PC floppy drive (click to unfold)
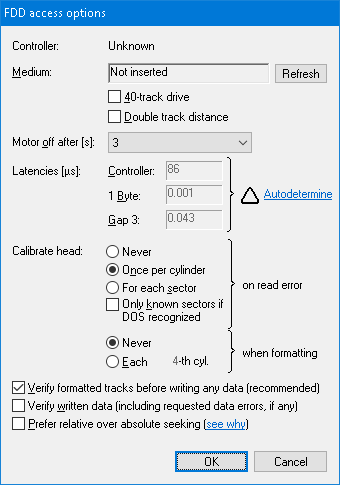
- The FDD access options dialog pops up. There are several settings that you might want to revise:
- The following two checkboxes are for working with 40-track floppies: 40-track drive (Alt+4) when ticked specifies that the drive's nominal cylinder count is 40 (and going beyond this limit may destroy the drive), and Double track distance (Alt+D) when ticked specifies if an 80-track drive should be used as a 40-track drive. A warning sign ▲ may wrap both of these checkboxes to indicate potential inconsistency.
- Head calibration strategy after a read error has been encountered (Alt+N, or Alt+S) – the default selection usually suffices.
- If you will be saving some data to the floppy, it is good to have the Verify written data option on (Alt+W).
You may leave the other values to their defaults and click on OK.
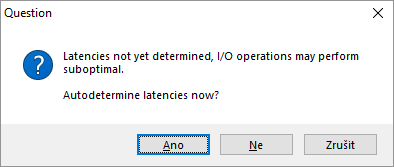
- If not done so before, the application suggests to autodetermine the floppy controller latencies. It is recommended to accept the suggestion by clicking on Yes – with correctly set latencies, the application can perform up to twice as fast than with the default values! Clicking on No, you reject the autodetermination this time, and clicking on Cancel makes the application ask no more about the latencies.
- Greaseweazle or KryoFlux (click to unfold)
- A Flux device access options dialog pops up. The default values usually suffice for reliable general read/write access to a floppy. The only two settings which you may want to revise for each inserted floppy are the Flux decoder and Jitter and other corrections, explained next.
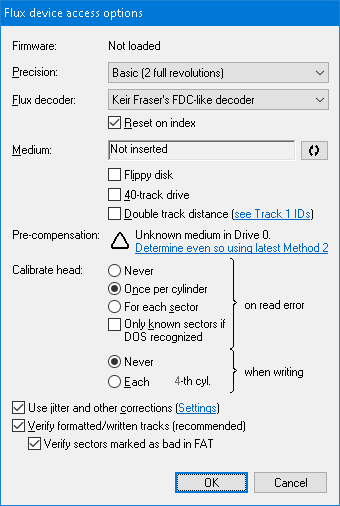
- Where there's just single flux encoder (and thus hidden from the settings), there are several Flux decoders (Alt+F), each with slightly distinct characteristics.
- Keir Fraser's FDC-like decoder (default) – simple, fast, pliable, less stable in "quiet zones" of a track (e.g. MFM synchronization), but still greatly reliable. Usually gains success with magnetically impaired floppies where other decoders fail.
- Mark Ogden's FDC-like decoder – simplified implementation of US Patent 4.808.884 on DPLL, slower than Keir Fraser's decoder, but more stable in "quiet zones" of a track. Tends to decode bad sectors badly, hence gains less success with magnetically impaired floppies.
- None (just flux archivation) – turns decoding of fluxes off, along with jitter and other corrections, allowing thus for fast naïve archivation without head calibration.
Furthermore, the Reset on index (Alt+R) check-box allows for optional reset of selected decoder after encountering an index pulse – by default checked to immitate the behavior of real floppy controller. Uncheck if the decoder systematically can't catch the first sector on tracks.
- Flux decoding can be improved by first applying Jitter and other corrections (Alt+C) to magnetic signal obtained from the device. Clicking on the Settings hyperlink, the Flux corrections dialog pops up. Note any corrections are safe to apply only to copy-unprotected disks!
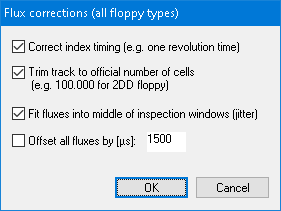
- If intending to modify the disk, you should pay a special attention at the pre-compensation which should be determined by the latest method before attempting to format/modify a floppy (see why). If not determined or outdated for specific floppy type and/or drive, a warning sign ▲ appears next to the link to determine/update it.
- There are several other settings that you yet might want to revise:
- The following two checkboxes are for working with 40-track floppies: 40-track drive (Alt+4) when ticked specifies that the drive's nominal cylinder count is 40 (and going beyond this limit may destroy the drive), and Double track distance (Alt+D) when ticked specifies if an 80-track drive should be used as a 40-track drive. A warning sign ▲ may wrap both of these checkboxes to indicate potential inconsistency.
- You may want to revise head calibration strategy after a read error has been encountered (Alt+N, or Alt+S) – the default selection usually suffices.
- It is recommended to have the Formatted track verification (Alt+V) checkbox turned on. If turned on, bad sectors will be marked in the FAT initially as bad, otherwise they will be added as empty without verification.
- You may leave the remaining values to their defaults and click on OK.
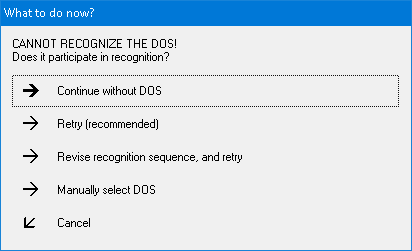
- If there are no problems, the drive starts working with the floppy as the application attempts to recognize the filesystem. If the application fails to recognize the filesystem, a message is shown (see figure below), after whose dismisal only container-related tabs appear (e.g. only the Track Map tab). In contrast, if the application has recognized the filesystem, it mediates access to the files stored on the floppy using DOS-related tabs (e.g. the File Manager tab).
See also


