Home ► RIDE ► FAQs ► Answer
RIDE soon to migrate to another web domain, announced in the new version of the application, while this web domain silently ceases to function! Please update your bookmarks/links once the new version of RIDE is out!
How do I create an image of a real floppy disk?
Applies to: RIDE 1.7.9 and later
- Open a real floppy disk (see how).
- Click on Disk → Dump to show the Dump to destination dialog.
- Click on the Destination button (Alt+D) to show a classical Save file dialog. In it, specify the target image name including its extension (e.g. *.IMA). The extension is important to explicitly specify the type of container that will be used as the target! For example, the MyImage.dsk is a fully specified name, resulting in usage of DSK image as the target. In contrast, the MyImage is incompletely specified name – DOS "typical" container is assumed (e.g. *.MBD for BS-DOS). If DOS has not been recognized, an incompletely specified name results in an error.
- Press the Save button to close the dialog and return to the Dump to destination dialog.
- Along with its name, the application now also shows the type of container recognized from the extension.
- The Dump to destination dialog has been preset to dump the whole disk to an image, plus some extra tracks beyond the nominal drive capacity (some disks contain here "secret" tracks, serving as a copy-protection). If the DOS has been recognized by the application, you usually at this moment may press the Dump button. However, there still may be settings to revise, especially if the DOS has not been recognized.
- Confirm the value set in the Medium combo-box (Alt+M). If it doesn't specify the right floppy type, change it to comply with the floppy inserted in the drive. Such inconsistency may occur, for instance, if the DOS has not been recognized.
- Specify the range of Cylinders to dump to the image (Alt+F, and Alt+T, respectively). You usually may leave the default values (whole floppy will be dumped).
- The Encoding (Alt+E) specifies the method used for data representation in the target disk. This combo-box currently always contains just a single option (so you can safely ignore it at the moment), however, more DOSes and encodings are to come, hence please stay tuned.
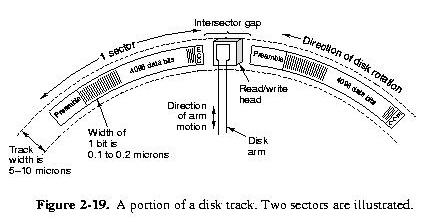
- The Gap3 value (Alt+G) represents the inter-sector gap, and it's usually not necessary to change it. Some game producers liked to decrease this value to accommodate an extra sector that normally would not fit in the track (usually as part of their copy-protection, e.g. Titus the Fox game by Titus Interactive). If you stumble upon a track that is apparently longer than common tracks, try to decrease this value. The default for this value derives from recognized DOS, or follows the IBM recommendation if DOS hasn't been recognized.
- The Filler Byte (Alt+B) determines the value that will be used as the initial content of fresh formatted sectors. You usually may leave the default.
- The Do full track analysis checkbox (Alt+A) subjects each track in currently open disk to low-level timing analysis. This analysis consists of (1) search for non-formatted areas, (2) search for data in gaps, and (3) search for fuzzy regions in data. This checkbox is enabled (and ticked by default) if the currently opened container provides such low-level information (e.g. KryoFlux Stream files or KryoFlux device itself). This checkbox is enabled even if the target container actually doesn't store the low-level information – with this option ticked during dumping to a less featured container (e.g. raw-data *.IMA), you can evaluate on-the-fly which uncommon information, if any, you are about to lose in the less featured container (for instance, you may lose significant data in a gap as part of a copy-protection).
- The Show report when done checkbox (Alt+R) instructs the application to show a summary at the end of the dump. Included in the report is a summary of what errors arose and a summary of the full track low-level analysis (Alt+A).
- If observing delays in accessing the floppy drive (e.g. in a highly concurrent environment), be sure to have the Real-time thread priority check-box (Alt+P) ticked.
- Press the Dump button.
- If (and only if) the range of cylinders specified in the Dump to destination dialog doesn't match the official geometry obtained from the boot sector (if any), you are presented a dialog to revise this mismatch.
- Continue with format adopted from boot sector updates the range of cylinders so that the whole "official" part of the disk is covered. Provided there is no copy-protection, use this option if creating images for emulators.
- Continue to last occupied cylinder updates the range of cylinders so that only occupied part of the disk is covered. Use this option if creating images of user data, e.g. saved positions, documents, etc. This options differs from the previous one in that it may finish faster.
- Continue with current settings leaves the range of cylinders unmodified. Use this option if unsure about copy-protection. Seeing a dump fail towards the end of the session is typically an indication of secret data beyond the official format. In such case, re-run the dump with a more featured image (e.g. *.DSK or *.SCP) to account for these secret data.
- If the target image initialization requires intervention, a corresponding dialog will pop up (e.g. for a *.DSK image).
- A dialog displaying progress of dumping shows up.
- Occasionally during dumping, the Sector read error dialog may pop up, reporting on errors while reading a particular sector. For copy-protected floppies, you may accept the errors (see the Accept button options), otherwise you may want to reattempt reading the sector (the Retry button) or choose one of recovery strategies (the Recover button options).
See also